School Bus Interior Camera Locations Explained
It’s no surprise that interior cameras play a pivotal role in ensuring the well-being of students during their commutes. However, it’s not just about having cameras. Their placement is equally crucial. Proper positioning can mean the difference between catching a crucial moment and missing it entirely.
Where would you mount the cameras specifically?
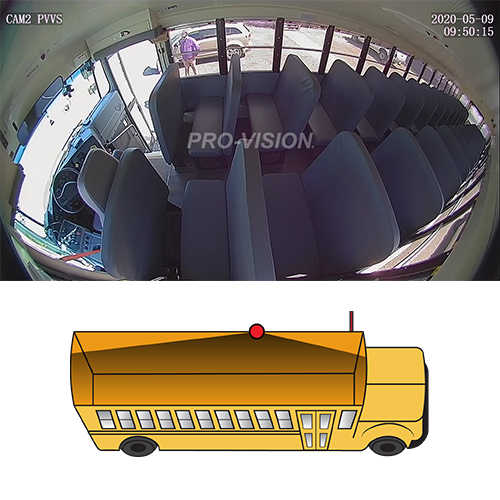
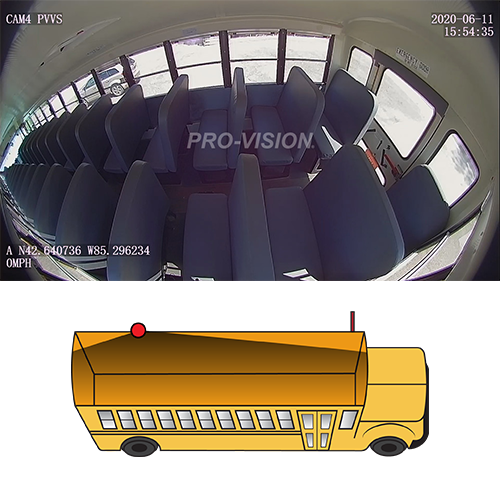
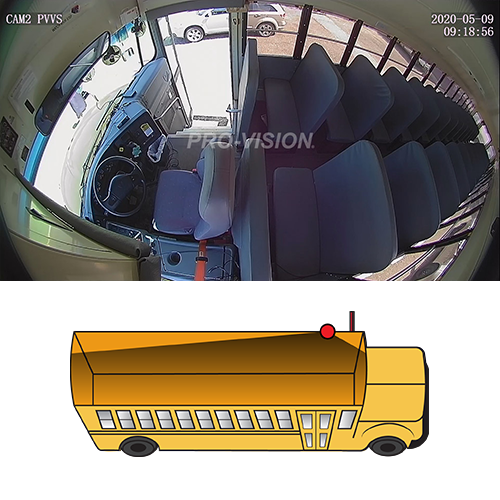
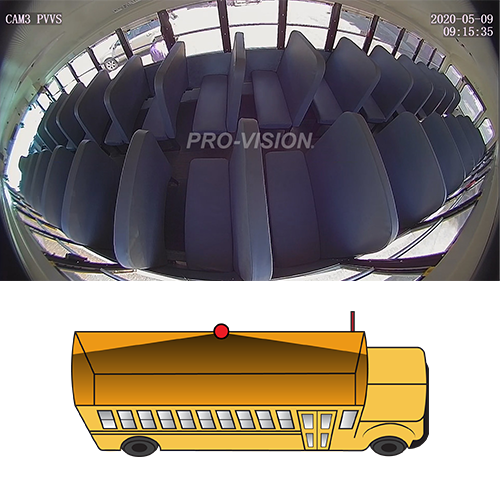
It depends on multiple variables from bus type, length, layout, and more. For now, let’s assume that they’re all full-size school buses. Each bus will have about three to four cameras, with one in the front, one in the back, and one to two in the middle. The front camera covers the driver, door, and first couple of rows, while the back camera focuses on the back few rows as they tend to be the most incident-prone.
Why are cameras on the side of the bus?
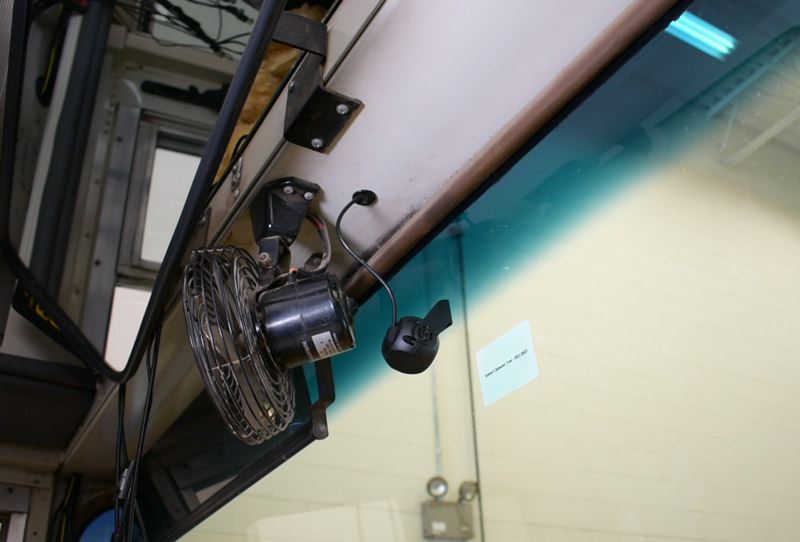
Keeping cameras on the sides of the buses and away from the center reduces the possibility of a camera injuring a standing passenger. While modern designs now allow flush-mounted cameras, these designs will still not work in the center of the buses, and even if they did, they would be more time-consuming and expensive to run the wiring.
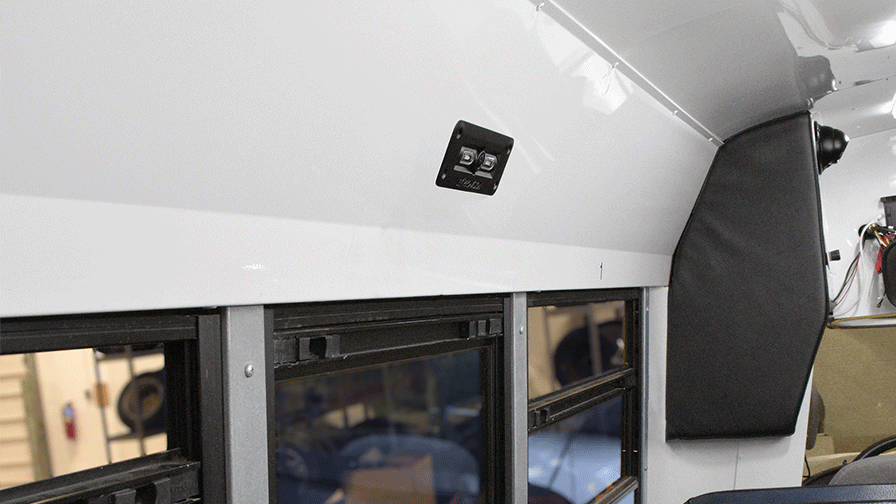
Why specifically are they on the driver’s side?
Usually, wiring is much easier on the driver’s side, making it the best place to mount the DVR. This is easier than having to mount anything in the center of the bus or on the passenger side. Since this location makes it easier to run the camera wiring, installation time is less than the other alternatives, which saves considerable costs. The driver-side view also provides a better picture of people entering and exiting the bus, since it faces the main entry door.
How many cameras are best?
If your budget allows for three or four cameras, you’ll always get better coverage than one or two. Of course, running any camera inside a bus is better than not running anything or using unreliable old cameras that may or may not work. Depending on the number of cameras here are some sample camera views and recommendations depending on how many cameras you run:
Single Camera System – One Interior Camera at Front
Two Camera System – Two Interior Cameras, One at Front and One at Rear
Three Camera System – Forward-Facing Camera + Two Interior Cameras
Four Camera System – Forward-Facing Camera and Three Interior Cameras
Five Camera System – Forward-Facing Camera and Four Interior Cameras

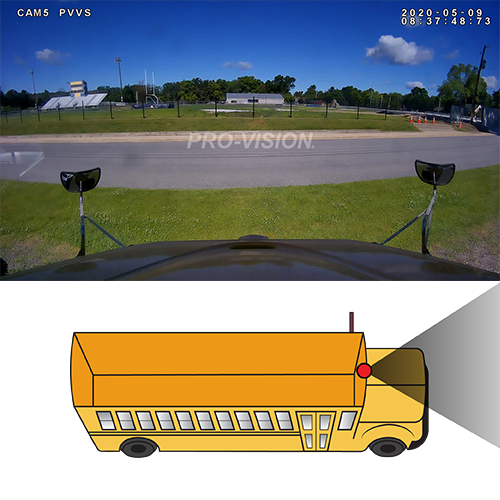
What about a forward-facing camera?
A forward-facing camera provides a clear record of what the driver can see in the event of an accident, making the footage a great training tool and can aid in refuting false claims. These cameras are placed at the highest point in the center of the windshield, just below any tinted portion. Buses commonly have a tinted horizontal section at the top of the windshield, which would obstruct the camera view.
Maximizing Safety: The Takeaway on Camera Locations
The strategic placement of interior cameras is a vital factor in optimizing the safety of our young commuters. It’s not merely about having cameras but ensuring they’re positioned to capture every essential detail. By understanding and implementing the best practices in camera placement, school districts can ensure a more transparent, accountable, and, most importantly, safer environment for students. For a comprehensive look to all potential camera locations, explore our school bus camera configuration options.